
Table of Contents
Project Overview
The Bathroom Buddy is a modified Lily~Bot designed to help children confidently navigate to and from the bathroom at night or during the day. Using a parent-laid floor track (line), the robot follows the path to the bathroom when activated by voice command, turns on its LED light, plays soothing music while the child is in the bathroom, and then returns to the room when asked.
Features:
- Voice Control: Responds to custom voice commands (“Wake”, “Bed”, “Freeze”, “Ping”, “Check”).
- Line Following Navigation: Follows a black line track between locations.
- LED Guidance Light: Lights up when guiding and during bathroom time.
- Soothing Audio Playback: Plays music or calming sounds stored in the sound module.
- Obstacle Detection: Avoids things in it’s way and try to get back on track.
- Return Function: Retraces the path back to the child’s room.
Make sure you have all these parts before you begin.
Bill of Materials (BOM)
- 1x Lily~Bot
https://www.noiresteminist.com/product-page/lily-bot-kit- Discount Code: STEAMDIVAS
- 1x Elechouse Voice Recognition Module V3
https://amzn.to/3Gr4sGh - 1x 8M Recordable Sound Play Module MP3 WAV Music Voice Player (it comes with a switch that you cut off to create bare wires for connecting to relay)
https://amzn.to/4lEkJXz - 1x 1-Channel 5V Relay Module
https://amzn.to/4lg5cgN - 1x LED (any color)
https://amzn.to/4mbao68 - 1x 330 ohm Resistor (You may use resistors from 220 Ohm to 1k Ohm, the size of the resistor determines the brightness of the LED, change LED value until you get the brightness level you want)
https://amzn.to/4mmqaKM - 1x HC-SR04 Ultrasonic Sensor
https://amzn.to/4lyfpog - Jumper Wires (male-to-male, male-to-female, female-to-female as needed)
https://amzn.to/44xXfMv - USB A-to-B Cable: For connecting Lily~Bot to computer. (Depending on your computer USB port)
https://amzn.to/3H95qHJ - USB B-to-C Cable: For connecting Lily~Bot to computer. (Depending on your computer USB port)
https://amzn.to/3IZGwL7 - Connectors
https://amzn.to/44QmdYQ - 9V Battery (For Lily~Bot)
https://amzn.to/4eKo9FW
I replaced the 9V battery with a more powerful Power supply which affected the speed rate in my code
12V 1200mah Power Supply
https://amzn.to/4gR5pWj - AA Batteries: (For Sound Module)
https://amzn.to/44tm0cW - Header Pins (For Voice module)
https://amzn.to/47gmSEE - IR Sensor
The one I should have used to make it easier (https://amzn.to/3Kwxdmz)
The one I actually used because I already had it at home https://amzn.to/4gNHuH6
- 1x Lily~Bot
Software Needed
- Computer with Arduino IDE installed
- Small Screwdriver
- Wire stripper/cutter
- Soldering iron and solder
- Heat shrink or electrical tape
- (Optional) Multimeter for troubleshooting voltage
- Always disconnect power from Lily~Bot before making or changing any wiring connections.
- Double-check all wiring before applying power. Incorrect wiring can damage components.
- Be aware of moving parts once motors are powered. Keep fingers and loose items away from wheels.
- Handle batteries carefully to avoid shorts.
Install Arduino to your computer
This is the step where you install Arduino to your computer, if you already have Arduino installed you may skip this step.
https://docs.arduino.cc/tutorials/uno-rev3/getting-started/
Add Music to Sound Module
This is the step where you add music of your choice to the 8M Recordable Sound Play Module.
- Add Battery to the Music Module
- Find a mp3 version of the music of your choice
- You may download this from any free music on the internet
- With a MicroUsb, connect the module to your computer. The module is going to show as a drive.
- Drag and drop the music of your choice into the drive.
- You may delete the test music that came with the device or you may use it as your music
- Disconnect the music module from your computer using the safe to remove device option.
- Open the battery case and add 3 AAs battery.
- Test that your music is in the drive by pressing the switch button
- The music should play once the switch is set to on.
- If music does not play
- Troubleshooting
- Verify that the battery is correctly placed in the battery pack
- Verify that the music is installed correctly and it plays
- Troubleshooting
- Cut the 2 wires going to the switch
- Connect one end of the wire into the one end of the connector
- Connect another wire out of the 2nd end of the connector
- Connect the 2nd wire into another connector
- Connect a wire out of the 2nd end of the connector
- Find a mp3 version of the music of your choice
Connect Sound Module to Relay
This is the step where you connect the two wires from the switch to the Relay.
- From the wires on the connector to the Sound module, connect one of the wires on the connector to COM (Common) on the relay board and connect the other wire from the 2nd connector to the NO (Normally Open) on the relay board.
This is a CRITICAL step. The Elechouse Voice Recognition Module V3 needs to be trained with your voice for the specific commands at the exact IDs used in the code.
- Solder a connector to the Elechouse Voice Recognition Module V3
- Solder the connector to the 4 pin UART connector of (Vcc, Gnd, RxD, TxD)
- We have created soldering videos to teach you how to solder
- 🎤 Voice Module Unboxed! But First… Soldering 101 🔧 | RobotDiva
- In the case of soldering practice makes perfect.
- Ensure you adhere to all safety instructions when soldering
- If you are a child, please get an adult to assist you with the soldering.
- 🎤 Voice Module Unboxed! But First… Soldering 101 🔧 | RobotDiva
- You may also check online if you can find a module already soldered.
- Wire the Voice Module to Lily~Bot Arduino
- You will need a Microphone (I recommend using the Microphone that came with the device) to communicate with the module.
- Connect the GND pin to GND on the arduino board. That is the ground pin.
- Connect VCC to 5V
- Connect RxD to Digital Pin 3 of Arduino
- Connect TxD to Digital Pin 2 of Arduino
- Download the dedicated software for your Elechouse Voice Recognition Module V3 from the manufacturer’s website.
- Connect Lily~Bot to your computer using the USB cable.
- Install Arduino IDE: If you don’t have it, download and install the latest version from arduino.cc.
- Install VoiceRecognitionV3 Library:
- Open Arduino IDE.
- Go to Sketch > Include Library > Manage Libraries…
- Search for “VoiceRecognitionV3” and install it.
- Verify Arduino setup
- Select the right Arduino board, go to Tools > Board
- Select the right COM port Tools > Port
- Train the Voice Module using sample program for training module
- Go to File > Examples > VoiceRecognitionV3 > vr_sample_train

- Select the vr_sample_train and compile it
- Compile vr_sample_train sketch
- Use the checkmark for compiling code.
- Upload vr_sample_train sketch
- Use the right arrow to upload code.
- Open the Serial Monitor. (Ctrl + Shift +M)
- Make sure that the baud rate is set to 115200 and the “Newline” option is selected.
- If everything is fine, a menu will be shown on the serial monitor like the image, with instructions on how to train and load voice command.

- Train the following phrases to their corresponding Command IDs (Index Numbers):
- ID 0: “Wake” (To go to bathroom)
- ID 1: “Bed” (To return to location)
- ID 2: “Freeze” (To Stop)
- ID 3: “Ping” (To Stop)
- ID 10: “Check” (To Stop)
- Speak Clearly: Follow the Vr_Sample_Train instructions.
It would direct you to train each command multiple times per ID for consistency. Speak in the same tone and volume you’ll use when operating Lilybot. - Load and Test Data: After training, follow the instructions to load and test the trained data.
- Tips: You do not have to use the words I used, just ensure you put them in the same ID location to do the same things.
Useful Voice Training Tips:
- 1. There are bad voice commands which could not be recognized easily, such as “come on”. Change your command to get better performance if necessary.
- Make sure your command list doesn’t contain simple-pronunciation command, such as “Hi”, Hey”. The longer, the better.
- Make your command pronunciation different each other. The following two are not good if they are all in the same group: “There you are” “Here you are”
- Add commands used frequently in daily life as anti-interference commands. You may only need several valid commands for your application. For example, you are building a robot car. You need “go ahead”, “turn right”, “turn left”, “stop”, etc.
- Prepare Lily~Bot: Using Velcro set Lily~Bot to be able to get components
- Mount Components:
- Mount the HC-SR04 Sonar Sensor on the front of the robot, facing forward, clear of obstructions.
- Mount the Voice Recognition Module in a place where its microphone can easily pick up your voice commands.
- Mount the 8M Recordable Sound Play Module and the Relay Module in a convenient location.
- Place the LED in a visible spot on the breadboard.
- Place the 3 sensors underneath Lily~Bot
IMPORTANT: Refer to your specific component’s pin labels if they differ slightly from the common ones.
“Source Device” & “Source Pin”: Where the wire originates.
“Destination Device” & “Destination Pin”: Where the wire connects to.
“Function / Notes”: Provides a brief description of the connection’s purpose or specific details (e.g., resistor value).
Relay Terminals: IN (or SIG) for the control signal, DC+ (VCC) and DC- (GND) for power, and NO (Normally Open) and COM (Common) for the switching contacts.
Motor Driver Pins: VM for motor voltage input, VCC for logic voltage, GND for ground, AIN1/2 & BIN1/2 for motor direction, PWMA/B for motor speed.
Voice Module: Assumes the Elechouse Voice Recognition Module V3 uses SoftwareSerial on Arduino pins D2/D3.
8M Music Module: The two bare wires connected to the switch will be cut and connected to the relay’s NO and COM terminals.
Wiring Connections:
- TB6612 Motor Driver:
- VM: Connect to Arduino Vin.
- VCC: Connect to Arduino 5V.
- GND: Connect to Arduino GND. (Ensure all GND points on Motor driver are connected)
- AIN1 (D13), AIN2 (D12), BIN1 (D8), BIN2 (D9): Control motor direction.
- PWMA (D11), PWMB (D10): Control motor speed using PWM.
- Motor A+ / A-: To one DG01D-48-1 motor.
- Motor B+ / B-: To the other DG01D-48-1 motor.
- Elechouse Voice Recognition Module V3:
- 5V: To Arduino 5V.
- GND: To Arduino GND.
- TX: To Arduino Digital Pin 2.
- RX: To Arduino Digital Pin 3.
- 8M Recordable Sound Play Module:
- 5V: To Arduino 5V.
- GND: To Arduino GND.
- Two Bare Wires (Pushbutton): Connect one wire to the COM terminal of the 5V Relay Module, and the other wire to the NO (Normally Open) terminal of the 5V Relay Module.
- 1-Channel 5V Relay Module:
- DC+ (VCC): To Arduino 5V.
- DC- (GND): To Arduino GND.
- IN (or SIG): To Arduino Analog Pin A0.
- NO (Normally Open) & COM (Common): Connect the two bare wires from the 8M Music Module here.
- LED:
- Connect the longer leg (Anode) of the LED to one end of the 330 Ohm resistor.
- Connect the other end of the resistor to Arduino Digital Pin 4 (D4).
- Connect the shorter leg (Cathode) of the LED to Arduino GND.
- HC-SR04 Ultrasonic Sensor:
- VCC: To Arduino 5V.
- GND: To Arduino GND.
- Trig: To Arduino Digital Pin 5 (D5).
- Echo: To Arduino Digital Pin 6 (D6).
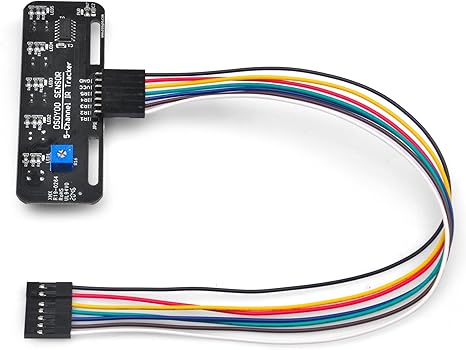
- IR Line Tracking Sensors (3-Sensor Array)
- VCC: To Arduino 5V.
- GND: To Arduino GND.
- Left Out: To Arduino Analog Pin A1
- Mid Out: To Arduino Analog Pin A2
- Right Out: To Arduino Analog Pin A3
- Motor Battery Pack:
- Already powered by Lily~Bot

Download Wiremap and other neccessary Documentation here:
https://github.com/STEAMDivas/LilyBot-Bathroom-Buddy
- Copy the Code: Copy the full Arduino code provided into a new sketch in the Arduino IDE.
- Connect your Lily~Bot to your computer using the USB cable.
- In Arduino IDE, select Tools > Board > Arduino Uno.
- Select Tools > Port > (Your Arduino Uno’s COM Port).
- Click the Upload button (right arrow icon).
- Wait for “Done uploading.”
1) Music module starting state
- Ensure the 8M sound module is OFF before power-up.
- If switch is cut → briefly short the two bare wires.
- If already on the relay → pop the wires off COM/NO, short them, then reconnect.
- This keeps isMusicOn() in sync with the actual module.
2) Power the Arduino only (no motors yet)
- USB to Arduino. Leave motor battery disconnected for safety.
3) Serial Monitor
- Open at 115200 baud. You should see:
Bathroom Buddy — Intelligent Avoidance Build
(VR load lines will not print; that’s fine.)
4) Voice sanity (no movement)
- Say “WAKE” (your trained phrase for ID 0).
Expect: LED ON, music ON, state goes to OUT_FOLLOW or OUT_SCAN (motors won’t move yet since motor power is off). - Say “FREEZE” (ID 2) or “PING”/“CHECK” (IDs 3/10).
Expect: immediate emergency stop — motors off, music OFF, LED flashes, then OFF. State STOPPED. - Say “BED” (ID 1) — while outbound this will be used at the bathroom pad.
5) Sensor checks
- IR line sensors (A1/A2/A3):
If you uncomment the debug option to read the raw data, lRaw/mRaw/rRaw you can see the threshold value.- Over black tape the readings around/above THRESHOLD (700); over white the reading are in the below. Please read your measurement and adjust the threshold that works.
You may tweak THRESHOLD (and keep HYST=30) so black is reliably “ON”. - Please note if you are using the OSOYOO IR Sensore select IR1, IR3 and IR5 for your 3 sensors.
- Over black tape the readings around/above THRESHOLD (700); over white the reading are in the below. Please read your measurement and adjust the threshold that works.
- Ultrasonic: Place a hand ~10–15 cm in front. During outbound/return, you should see state jump to AVOID_INIT/AVOID_ARC (pause/curve). When you remove your hand you should see AVOID_RECOVER and follow/scan resumes.
6) Relay/music test
- With relay connected (A0, active-LOW):
- After WAKE, music should turn ON automatically (musicOn()).
- In WAIT_AT_BATH, say “BED” → U-turn then return. At home marker, music turns OFF.
- Please note that the location of the speakers might make it difficult for the Voice recognition to understand your words.
7) Line Follow Test
- Lay a short line with two solid pads (bath & home) big enough that all three sensors see black for at least 300 ms.
- Say WAKE: LED ON, music ON, bot follows line.
- At bathroom pad the bathroom buddy should stop, WAIT_AT_BATH.
- Say BED and the bathroom buddy will make a U-turn, start return.
- Once it gets back to the initial location, it will stop, music will turn off and LED will turn off.
8) Obstacle avoidance demo
- While testing line following, place an object ≤ 18 cm ahead.
LilyBot should arc away from the nearest seen edge; curve tightens as it gets closer; times out after ~1.8 s.
- Power Up: Connect Arduino to power, then connect the motor battery to the TB6612 driver.
- Initial State Check: Ensure the music module is OFF before starting Lilybot. Ensure Lily~Bot is on the home pad.
- Wake Up: Say “Wake”. Music and LED will turn on and LilyBot will move to the Bath Pad
- Return Home: Say “Bed”. Lilybot will move back to it’s home pad
- Stop everything (Normal): Say “Freeze”, “Ping”, or “Check”. Lilybot will stop its current sequence, turn off music and LED.
- Emergency Stop: Say “Check” for an immediate, interruptive stop of all activity.
- Resync Music: If the music state ever gets out of sync (e.g., music is playing but Lilybot thinks it’s off), say “Ping” once. This will toggle the music module’s state and update Lilybot’s internal assumption. You might need to use it twice if it toggles to the wrong state initially.
- “Global Variable using 101% dynamic memory” Error:
- The provided code is heavily optimized for SRAM. If this error still occurs, it means the VoiceRecognitionV3 library itself, combined with your robot’s features, is too large for an Arduino Uno’s 2KB SRAM.
- Solution: You will need to either:
- Use a simpler voice recognition module: One that outputs digital pulses or uses a very lightweight library.
- Upgrade your Arduino board: To an Arduino Mega (8KB SRAM) or an ESP32 (much more RAM).
- No Voice Recognition:
- Check Voice Module Training: Did you train all commands correctly at the specified IDs? Is the voice data saved to the module?
- Speaking Consistency: Speak clearly, with the same tone and volume as during training. Minimize background noise.
- Wiring: Double-check TX/RX connections between Voice Module and Arduino (Pin 2 and 3). TX to RX, RX to TX.
- Baud Rate: Ensure myVR.begin(9600) matches the module’s baud rate (usually 9600).
- Cooldown: Wait for the minTimeBetweenCommands (1.5 seconds) before speaking a new command.
- Music Not Toggling/Playing:
- Relay Wiring: Ensure NO and COM on the relay are connected to the music module’s two bare wires.
- Relay Power: Confirm the relay module is receiving 5V and GND from Arduino.
- Relay Control Pin: Check Arduino A0 connection to the relay’s IN pin.
- Relay Activation: Listen for a click from the relay when you expect the music to toggle. If no click, check relay power and Arduino A0.
- Music Module Power: Ensure the 8M module battery is working and the switch is set to on.
- Initial State: Did you manually ensure the music module was OFF before powering Lilybot? Use the “Ping” command.
- Motors Not Moving:
- Motor Battery: Is the Lily~Bot receiving power?
- TB6612 Power: Is the motor driver getting 5V and GND from Arduino?
- Motor Wiring: Are motor wires correctly connected to TB6612 Motor A/B outputs?
- Arduino Pins: Are AIN1/2, BIN1/2, PWMA/PWMB connected to the correct Arduino pins (13,12,8,9,11,10)?
- Power source: Consider using a different power source with a higher current for your Lily~Bot than the 9V battery
- Robot Not Stopping (Emergency Stop):
- Voice Recognition: Is the “Halt” command being recognized (check Serial Monitor if you temporarily re-enable the print statements).
- delay() Duration: If your delay() calls within dance functions are still too long without checks, the robot might be unresponsive. The current code breaks them down, but review any custom additions.
- emergencyStopActive Flag: Ensure the return; statements are present after checks within dance helper functions.
- Sonar Not Working:
- Wiring: Check Trig (D5) and Echo (D6) connections.
- Power: Ensure 5V and GND are supplied to HC-SR04.
- Placement: Ensure no obstructions directly in front of the sensor.
- Dance Party Mode: Combine the Lily~Bot dance ability with Bathroom buddy so LilyBot can dance anytime there was a successful potty session.
- “Find Me” Mode: Using the voice module, we could add a “LilyBot, where are you?” command. In response, she could play a sound or flash her lights to help a child find her, adding a fun hide-and-seek element to the experience.
- PID Control for Line Following: This is a big step up from our current
if/elselogic. A PID (Proportional-Integral-Derivative) controller is an advanced algorithm that allows a robot to make very precise, smooth corrections to stay on a line. It would make LilyBot’s movements look professional and elegant. - A Speaker Module: This would allow LilyBot to do more than just play music. She could say simple phrases like “Great job!” or make fun sound effects for different actions, like a “beep-boop” when she’s searching for the line.
Good luck building your Bathroom Buddy Lilybot! It’s a fun and challenging project.
Required Components (Images)

It comes unsoldered with it’s microphone. Device would require soldering

It comes with a switch that you cut off to create bare wires for connecting to relay


You may use resistors from 220 Ohm to 1k Ohm, the size of the resistor determines the brightness of the LED, change LED value until you get the brightness level you want


Share this:
- Share on LinkedIn (Opens in new window) LinkedIn
- Share on Facebook (Opens in new window) Facebook
- Print (Opens in new window) Print
- More
- Share on Threads (Opens in new window) Threads
- Share on WhatsApp (Opens in new window) WhatsApp
- Share on Nextdoor (Opens in new window) Nextdoor
- Share on Bluesky (Opens in new window) Bluesky
- Share on X (Opens in new window) X
- Share on Telegram (Opens in new window) Telegram
- Share on Pinterest (Opens in new window) Pinterest
- Share on Reddit (Opens in new window) Reddit
- Share on X (Opens in new window) X
- Share on Tumblr (Opens in new window) Tumblr
- Share on Mastodon (Opens in new window) Mastodon
- Email a link to a friend (Opens in new window) Email
Discover more from STEAMDivas
Subscribe to get the latest posts sent to your email.
